
Reupholster a Settee and Create a Stunning Custom Look
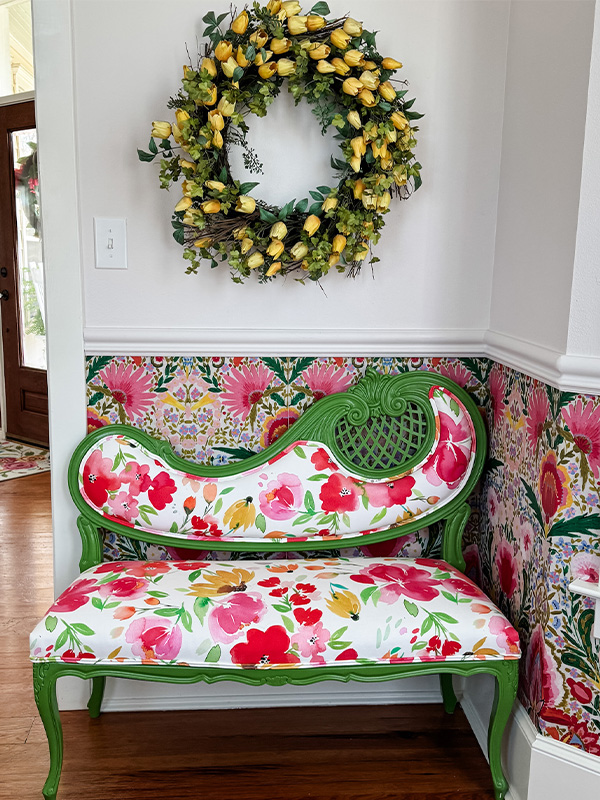
The uniqueness of antique furniture can inspire the idea of giving it a second, reupholstered life. Whether you receive something passed down from a relative, or luck out on a find at a thrift store —when you have that inkling to revive it, listen. Reupholstering furniture can be a great weekend project, and the feeling of accomplishment is unmatched. Spoonflower Maker Wendy Conklin of Chair Whimsy shows us how she’s giving a settee a second life. Wendy: Settees make great conversation pieces around the home. You can often find small ones that can be tucked into corners, placed along a feature wall, put at the end of a bed or used at a dining table for extra seating. If you’re a beginner, starting with a small one will be much easier for you to learn.
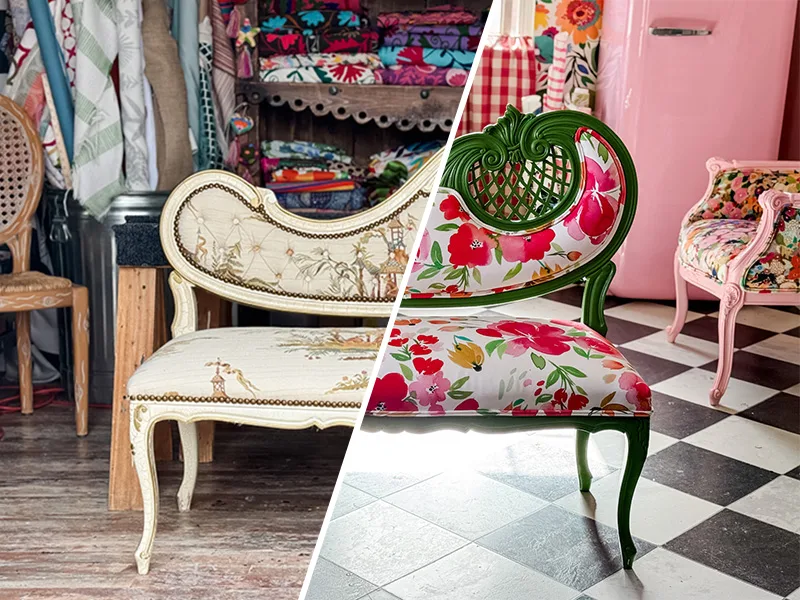
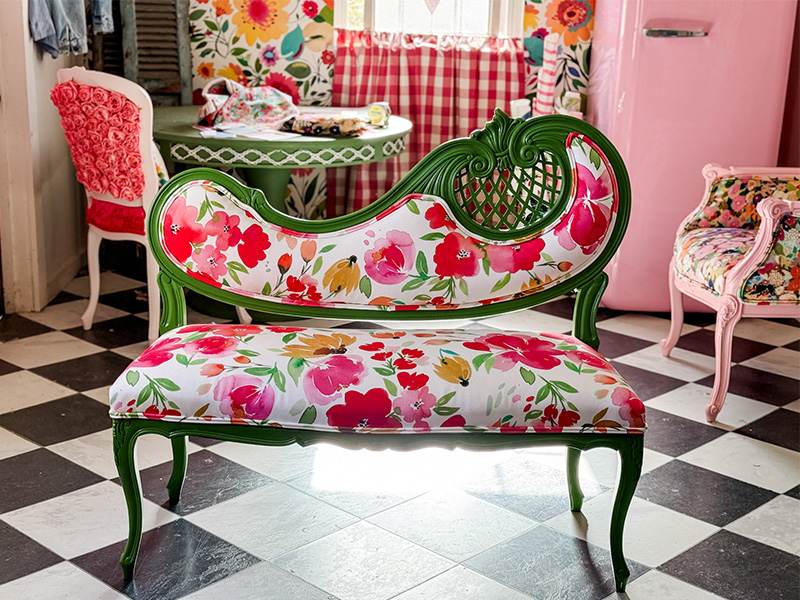
What is a settee?
A settee is a small, cushioned chair — similar to a sofa — that sits on wooden legs and accommodates, usually, two people. Settees were popular through the 18th and 19th centuries. Today, you may see settees in powder rooms, sitting rooms and other decorative areas.Why should I reupholster a settee?
A settee is a beautifully designed piece of furniture. With the right tender love and creativity, reupholstering one can be fun and provide an opportunity to bring your space together. If you want to get into upholstering, a small furniture piece like a settee is a good start.How to reupholster a settee:
Let’s start with the materials you’ll need to reupholster a settee.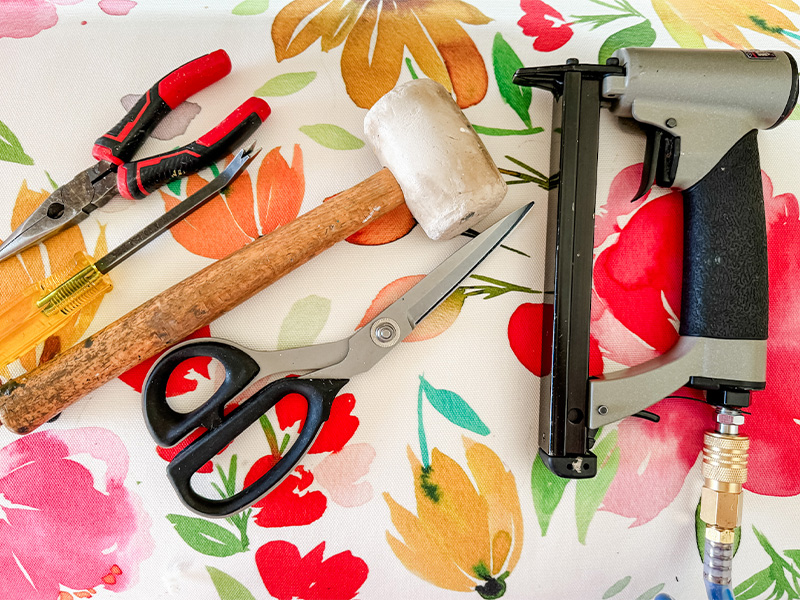
- Needle nose pliers
- Staple lifter
- Mallet
- Scissors
- Staple gun and a small compressor (you can use a manual stapler, but a staple gun and compressor make the job much easier on your hands)
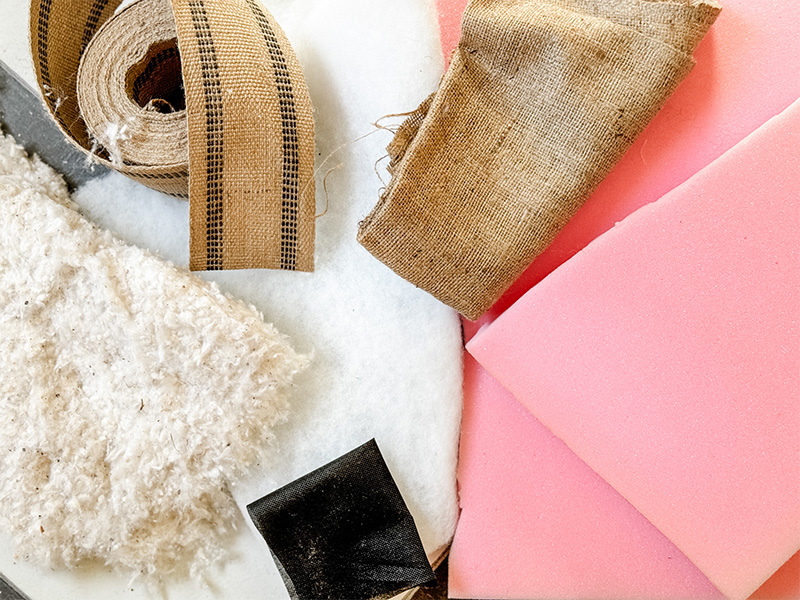
- 6 yards of Cypress Cotton Canvas — I’m using Smells Like Spring Watercolor Floral by ninola-design
- 1 yard of cotton
- 1 yard of jute webbing
- 1 yard of burlap
- 1 yard of 1″ medium-density foam
- 1 yard of 2″ medium-density foam
- Dust cover
- 1 roll of butcher paper or 1 poster board to make templates for the settee’s foam pieces and Dacron batting.
- (Optional) paint and paintbrush to paint the frame of your settee
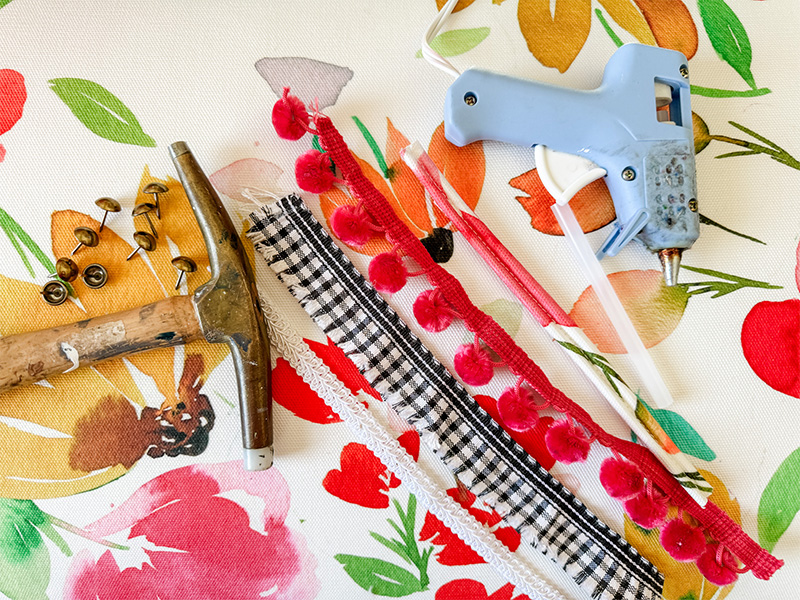
Decorative trim
Choose one of the following to cover your staple line:- Decorative tacks and a tack hammer
- Gimp, ribbon, pompom trim or double welt cord and a hot glue gun
Supply Notes:
- **Selecting the right trim: **Decorative tacks require a tack hammer and are a lot more time-consuming. Gimp, ribbon, pompom trim or double welt cord require a glue gun and glue sticks and are much easier to apply.
- **Fabric estimates: **Your chair may be slightly different than mine. To ensure you order enough supplies, see this post about upholstering to help estimate the amount of fabric you’ll need for your project.
Part 1. Strip the furniture down to the frame
Old furniture is often very telling of its age, so removing materials all the way down to the frame is always best.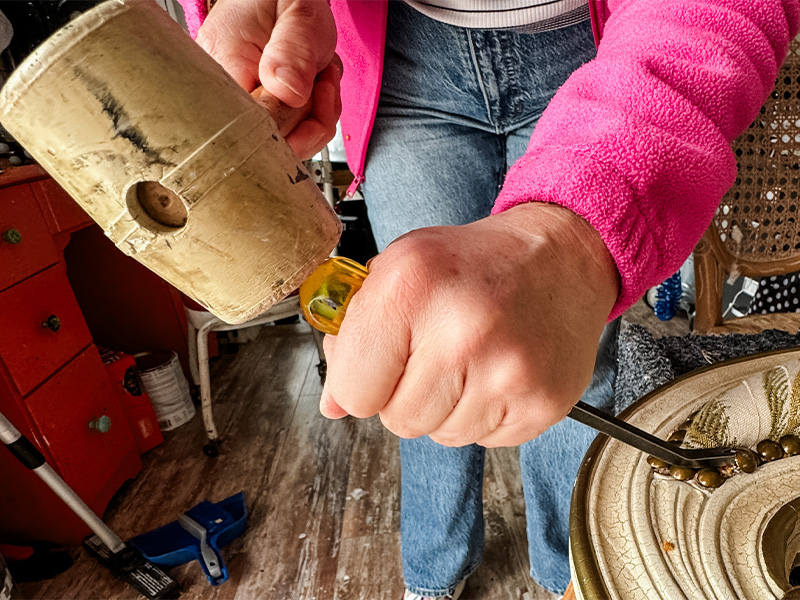
Step 1. Use your mallet and staple lifter to remove the staples and tacks
Remove the fabric and all the insides by taking out the staples or tacks. Use your staple lifter and mallet. Position one tooth of the staple lifter under the tack or staple.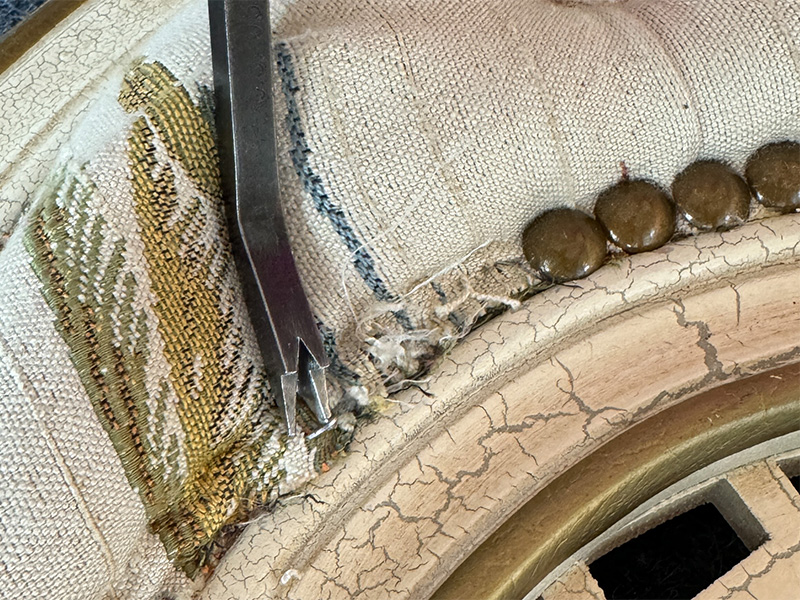
Step 2. Once your staple lifter is under the staple, pull up as you hammer
Use your mallet to hammer the end of the staple lifter until you’ve lodged the staple lifter underneath the staple. Pull up as you hammer.Step 3. Remove the staple or tack with your pliers
Continue until you have a clean frame. It takes a little time and effort, but think of it like pulling weeds. It’s mindless work and you’ll be glad you did it once it’s complete.Optional Part 2. Paint your settee’s frame
If you’re satisfied with your settee’s original color, continue to Part 3.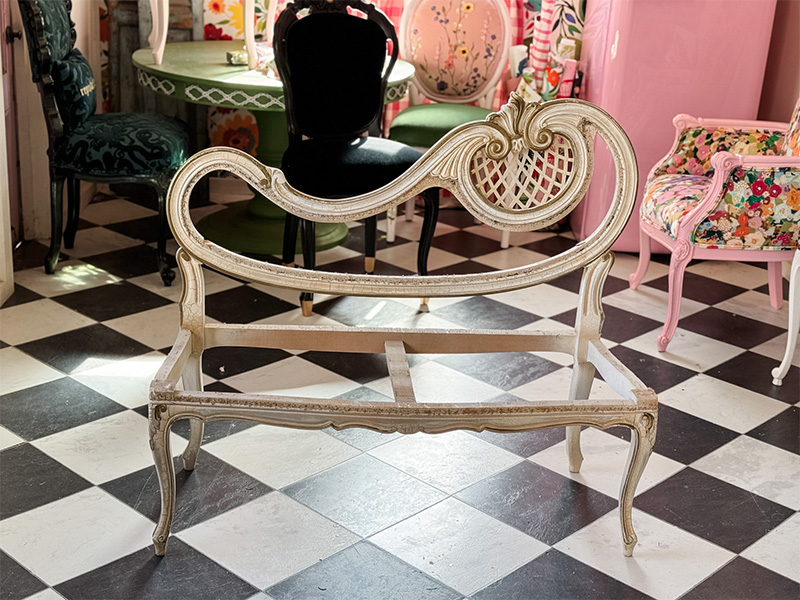
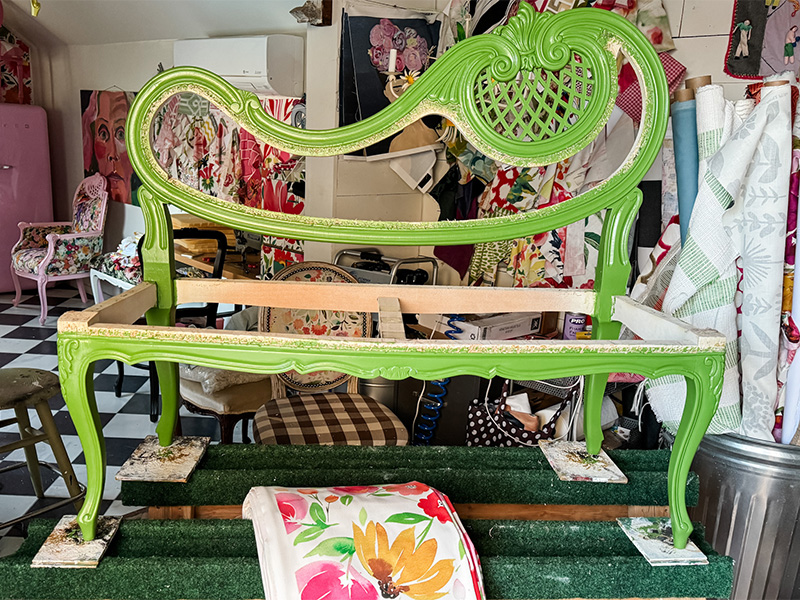
Part 3. How to reupholster the top of a settee chair
This is the part where you’ll be adding several layers onto the wood base to make it comfortable to sit on. First jute webbing, then burlap, then cotton, then foam, then Dacron. The steps below will walk you through all those layers, with photos too! Start by laying the settee down on a table or set of sawhorses so that you can work over top of it.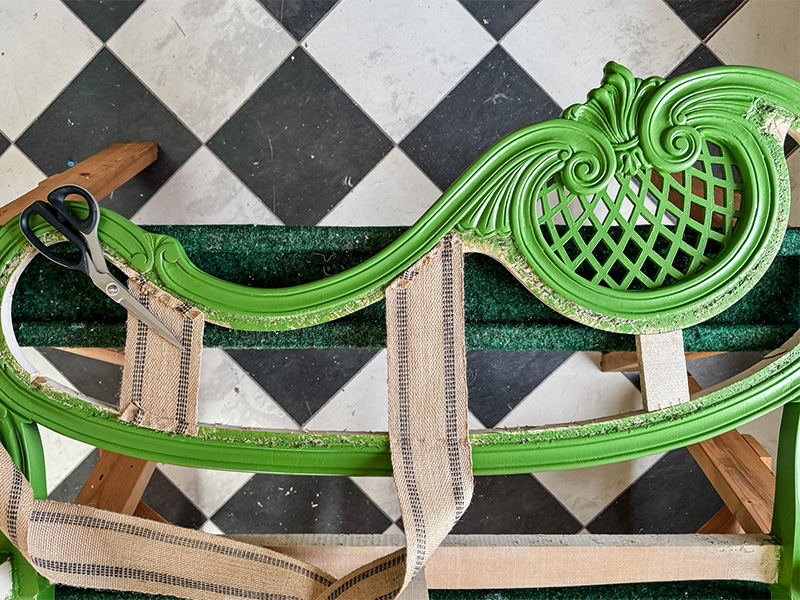
Step 4. Staple jute webbing to the settee’s back
Position a couple of pieces of jute webbing strategically to help support the fabric. Staple in place and fold over the end pieces.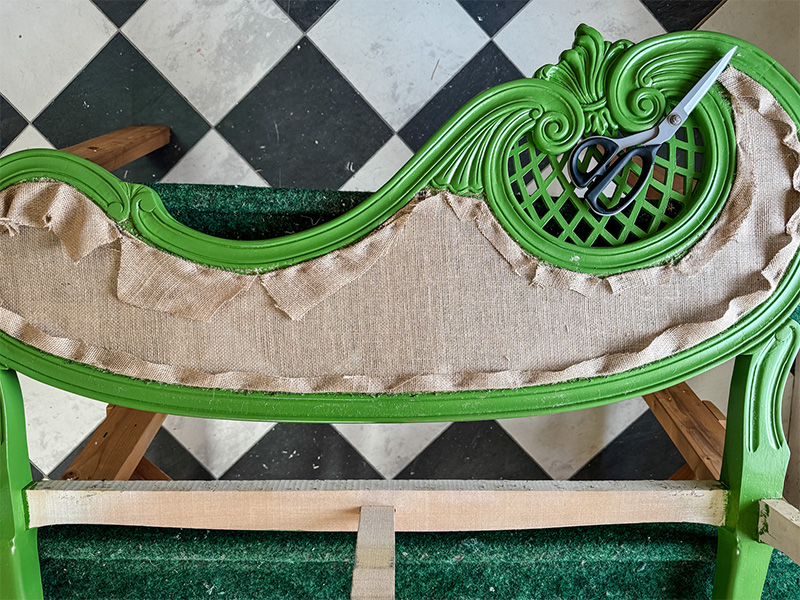
Step 5. Staple burlap over the webbing
After securing the jute webbing, staple a layer of burlap tightly within the settee’s top. Fold in the edges and staple so that none are hanging over the side.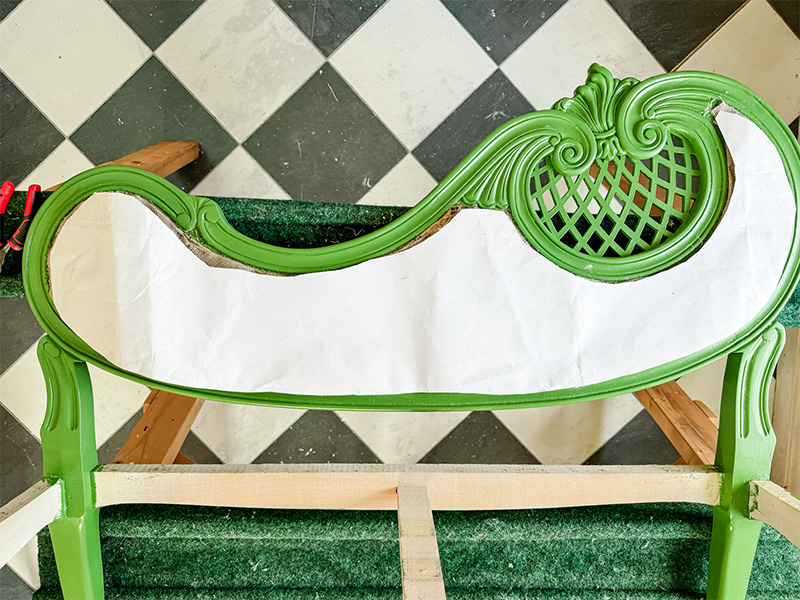
Step 6. Make a paper template
Lay paper across the top of your settee. Trace around the top — where we’ve placed the jute webbing and burlap — to make a template. This will help us prepare the right amount of foam for this area.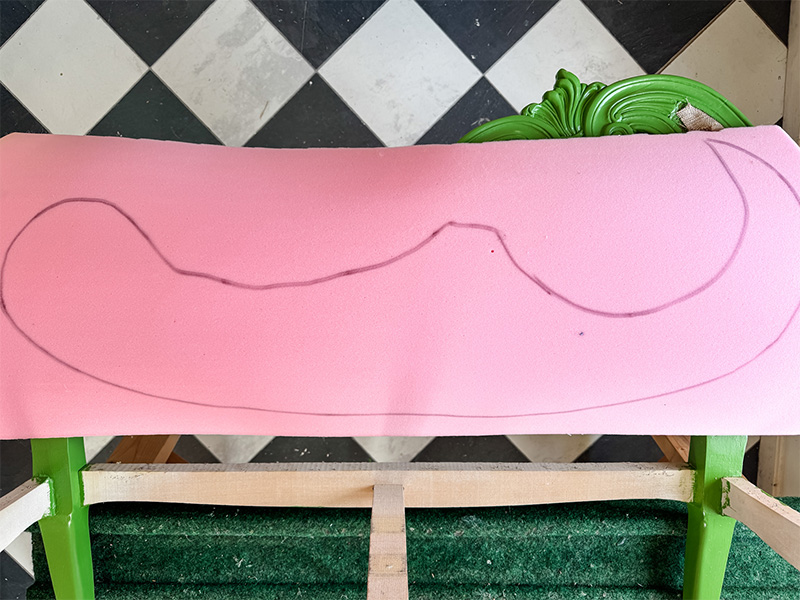
Step 7. Trace and cut out your foam
Use your paper template to trace and cut out a piece of 1” medium-density foam. We’re not adding the foam just yet. It’s easier to trace out the template on the burlap rather than the cotton we’re adding in the next step. After cutting out your foam template, place it to the side. We’re coming back to it in step 9.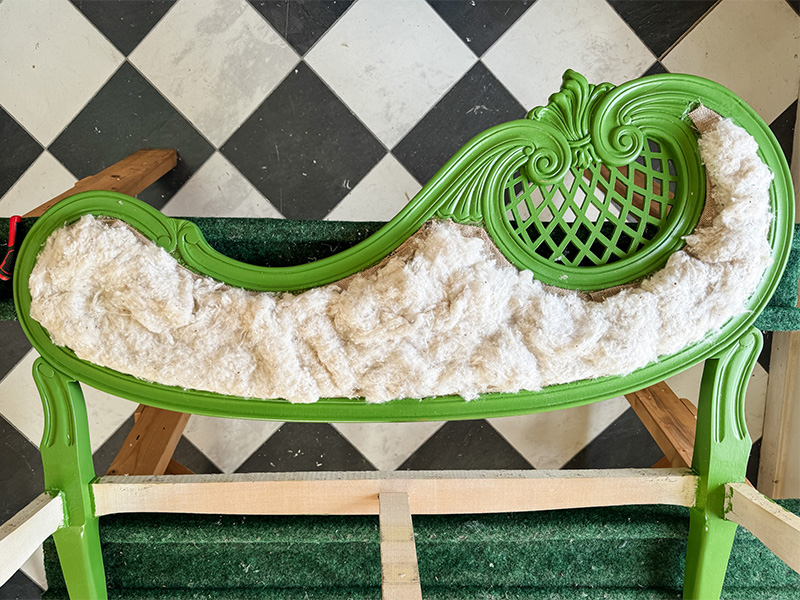
Step 8. Place cotton on your burlap
The next layer we’re adding to our settee top is cotton. This will go on top of the burlap.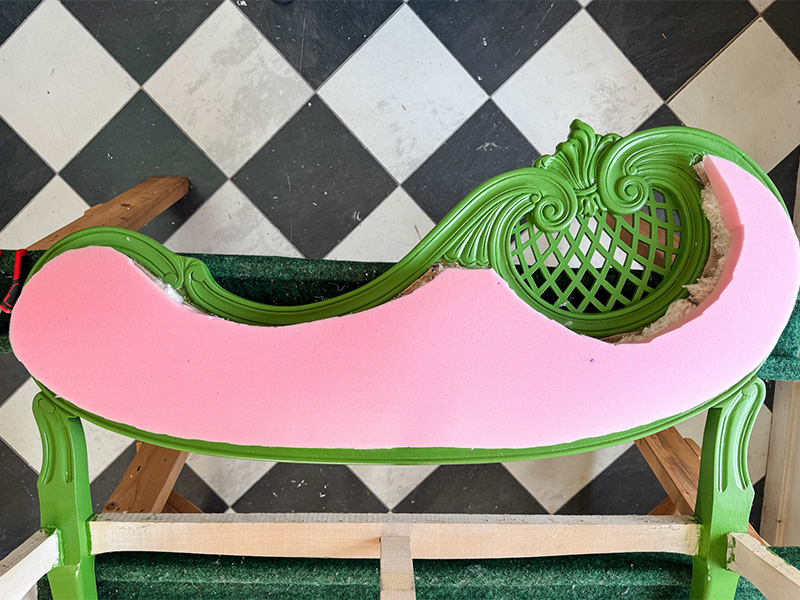
Step 9. Place your foam on top of the cotton
Grab your foam piece and place it on top of your cotton layer.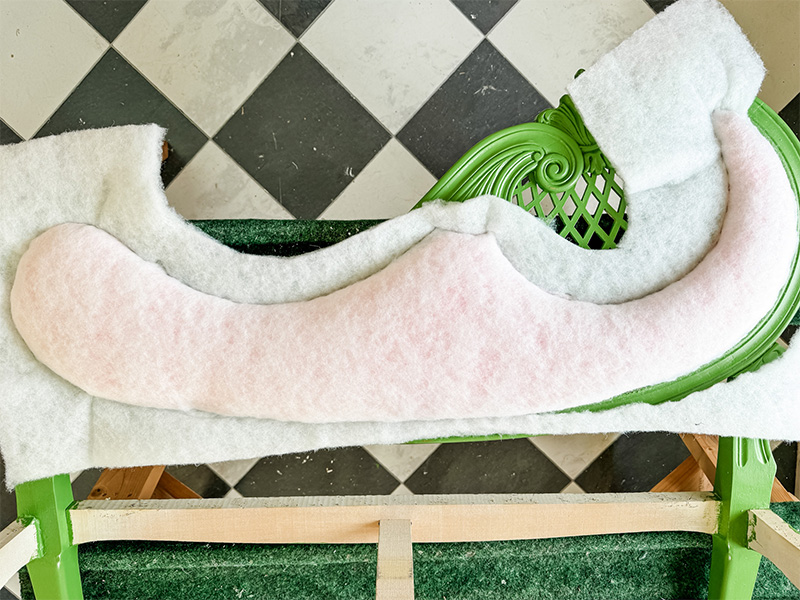
Step 10: Layer on and staple Dacron
Place a layer of Dacron on top of your form. Staple your Dacron in place, pushing the cotton and foam down firmly as you go.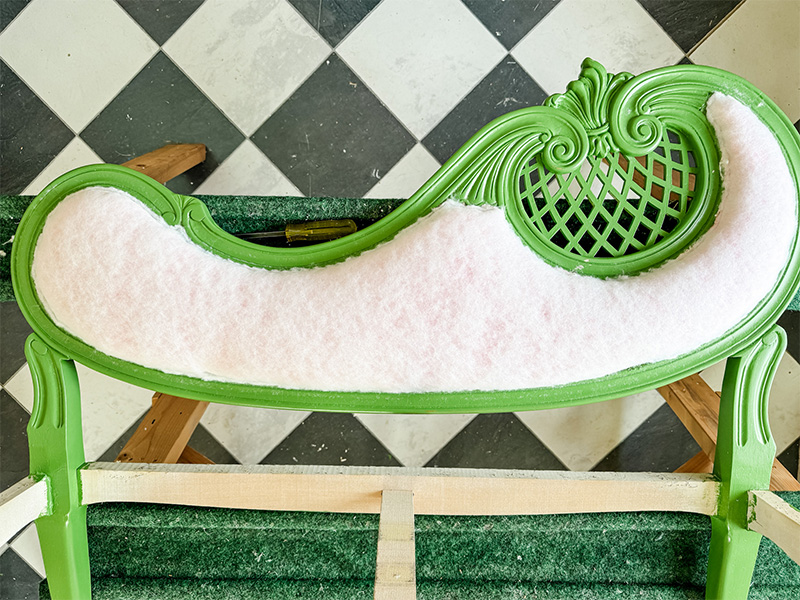
Step 11. Trim excess Dacron
Now that your Dacron (and other insides) are secure, trim off the excess Dacron.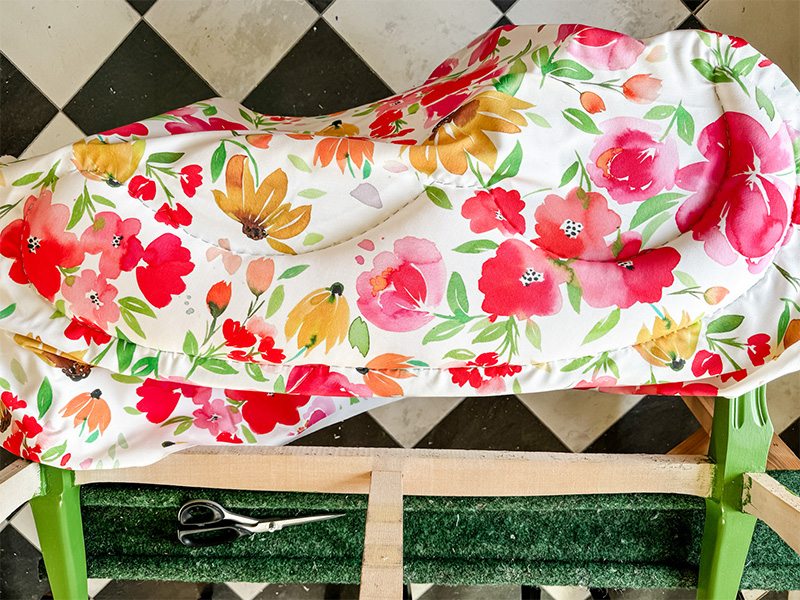
Step 12. Position and staple your fabric
Arrange the fabric to get the very best look. I always take my time with this step because it matters the most. Once you’ve decided on your ideal placement, staple the fabric tightly into place. Use scissors to cut away the excess fabric.Part 4. How to reupholster the back
This side is going to go a little quicker than the front but will still be as beautiful and secure!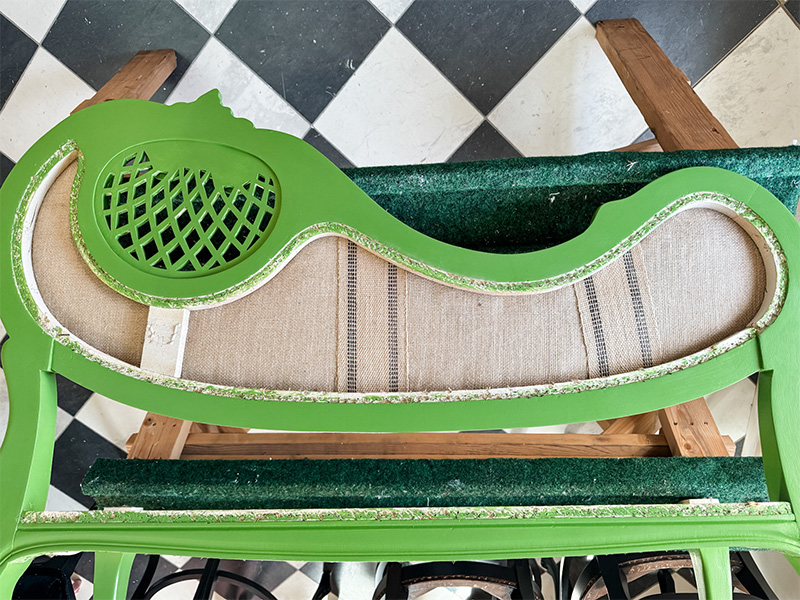
Step 13. Have the back facing up
Now that we’re working on the back of your settee, turn it so the backside is facing up. Make sure you’re working in a space where it can lay flat.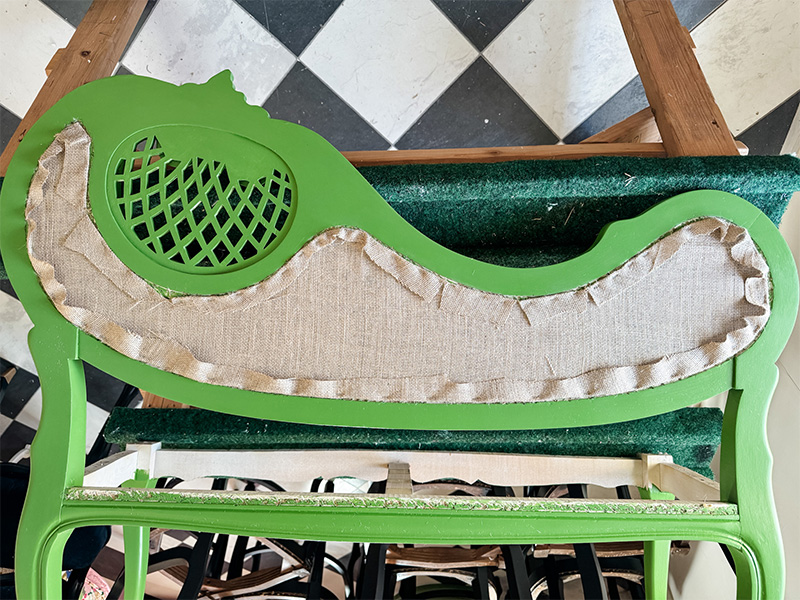
Step 14. Attach burlap to the back side
Staple a layer of burlap tightly to the back. Fold back and staple the edges to keep things neat.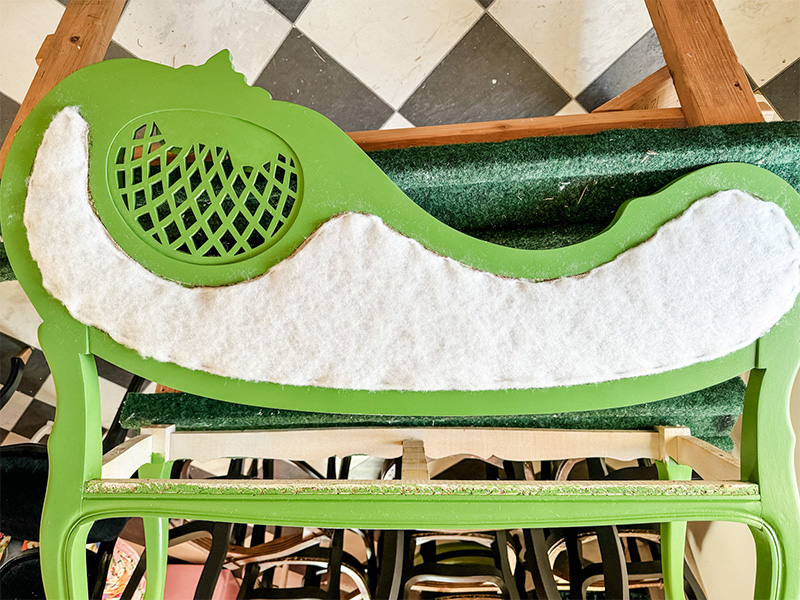
Step 15. Add a layer of Dacron
Cover the back with a layer of Dacron and staple it into place.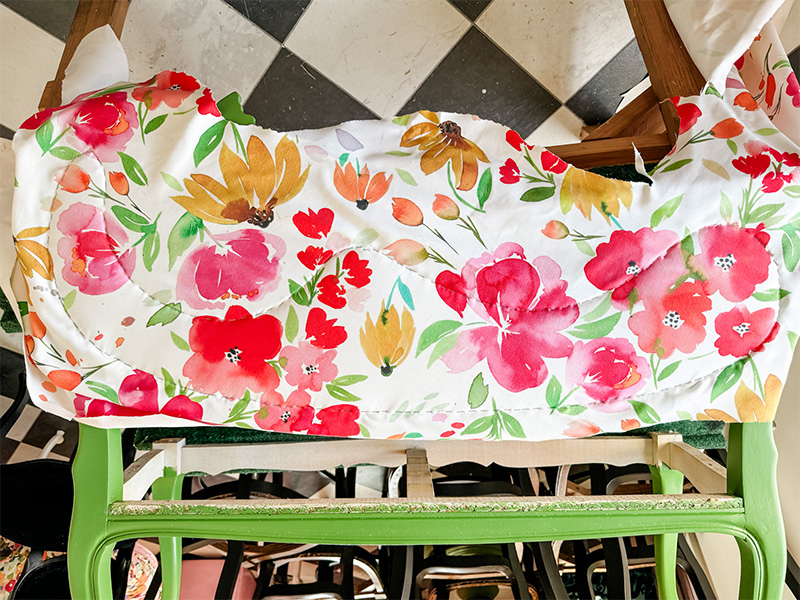
Step 16. Position and secure your fabric
Position the fabric how you want it on the back and staple it into place. Cut off the excess fabric outside of the staple line.Part 5. How to reupholster the seat
These steps are going to look similar to reupholstering the top of the chair, so you’ve got this!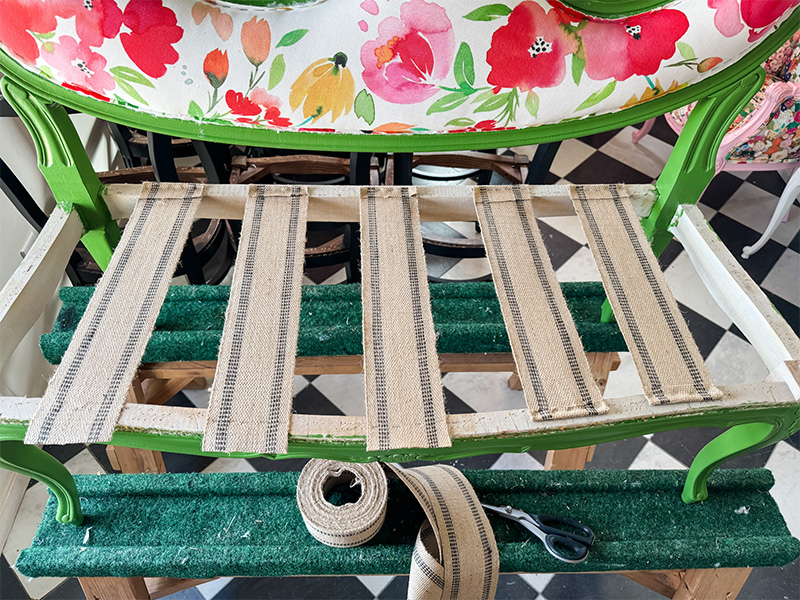
Step 17. Attach the vertical strips of jute webbing
Measure and cut strips of jute webbing that reach from the front to the back of the seat. Individually place each strip on the seat and staple one end. Pull tightly before stapling the other end. Fold back the edges and staple those down.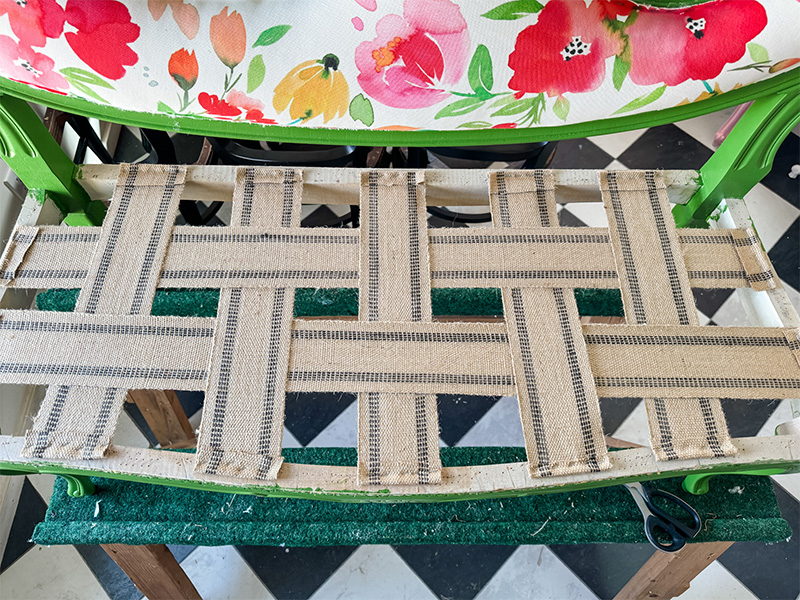
Step 18. Weave horizontal strips of jute webbing
Measure and cut strips of jute webbing that reach from the left to the right of the settee. Staple one end of these strips to the left side of the seat. Weave the horizontal strips through the vertical strips. Pull tightly on each strip as you staple them down on the right side, and fold back the edges. Now we have a solid base for our seat!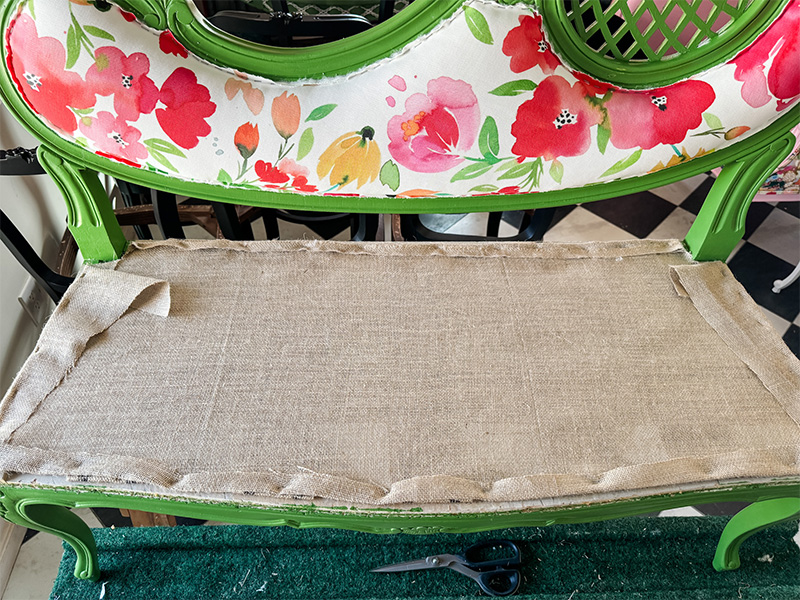
Step 19. Secure a layer of burlap
Place a layer of burlap across the seat and staple. Next, fold back and staple the edges.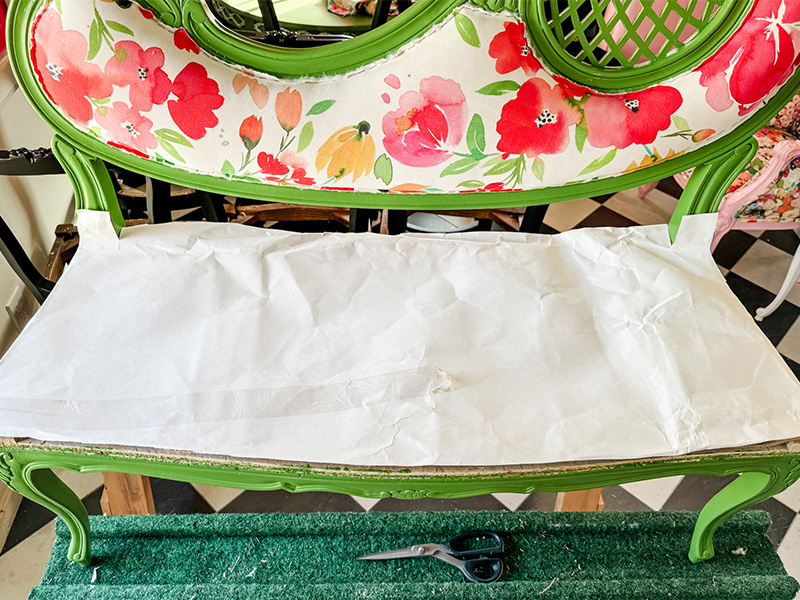
Step 20. Make a seat template using paper
Just like we made a template for the settee’s top, we’re going to do that for the seat. Lay your paper across the seat and make a template. Be sure to mark where the back supporting legs are. Trace your paper template onto the 2” medium-dense foam and cut it out. (Some people like to use an electric knife for this.) Set the foam to the side. We’ll come back to it after the next step.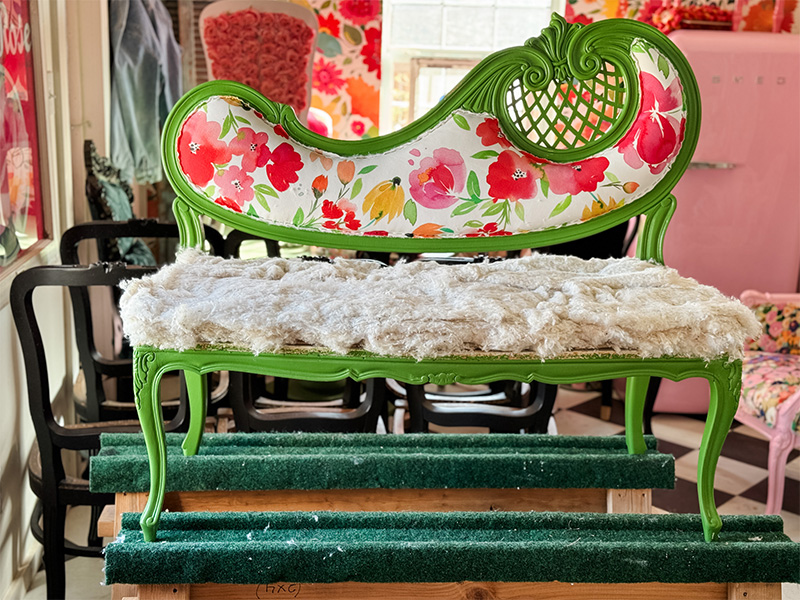
Step 21. Layer cotton on top of your burlap
Pile the cotton evenly across the seat on top of your stapled burlap. Lay a nice, thick layer to make the seat more comfortable.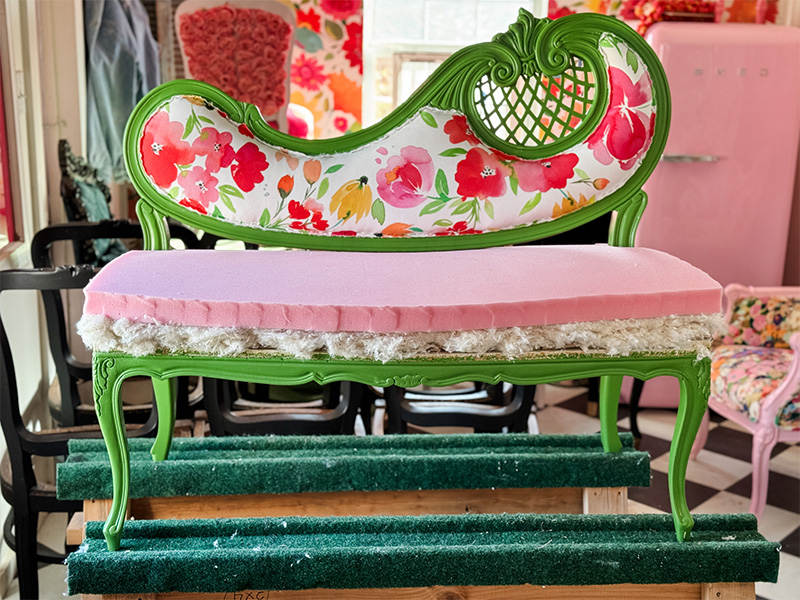
Step 22. Place the foam on your seat
Grab your 2” foam cutout and place it on top of the cotton.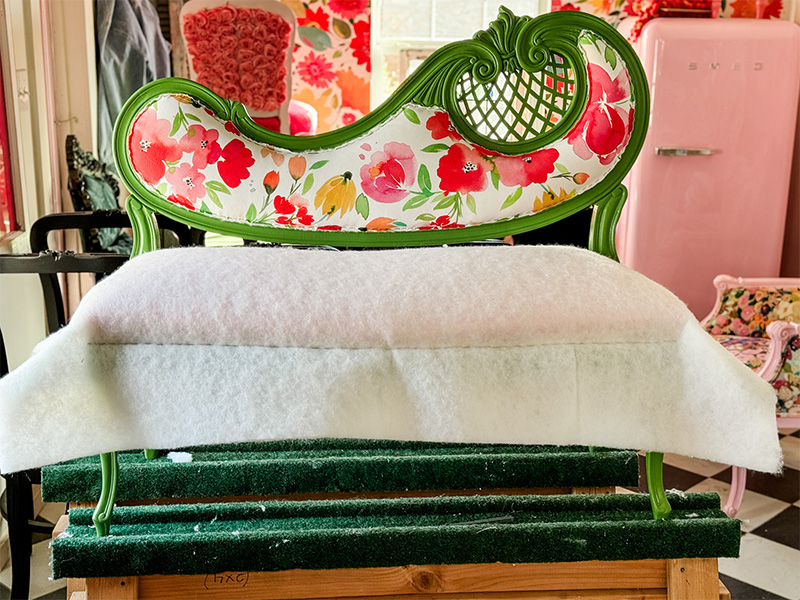
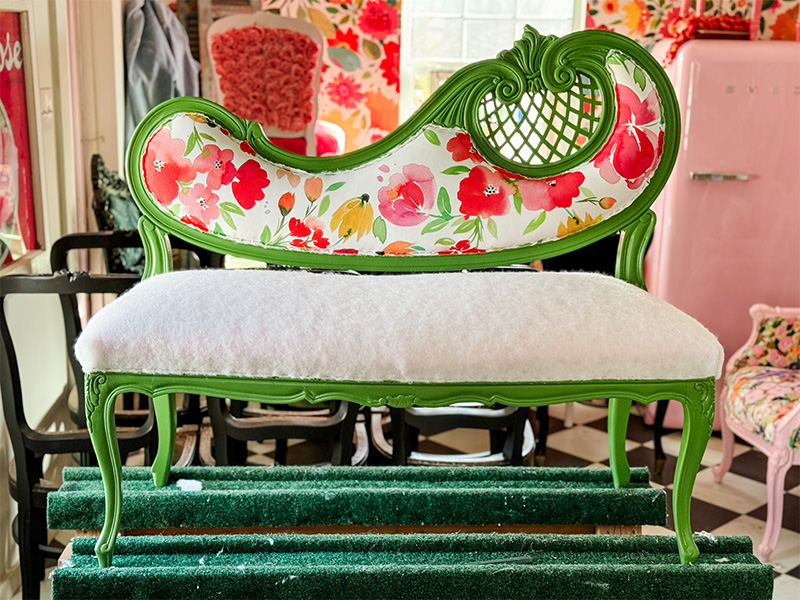
Step 23. Secure Dacron onto layers
Cover your settee layers with Dacron and staple it into place. Cut off the excess Dacron.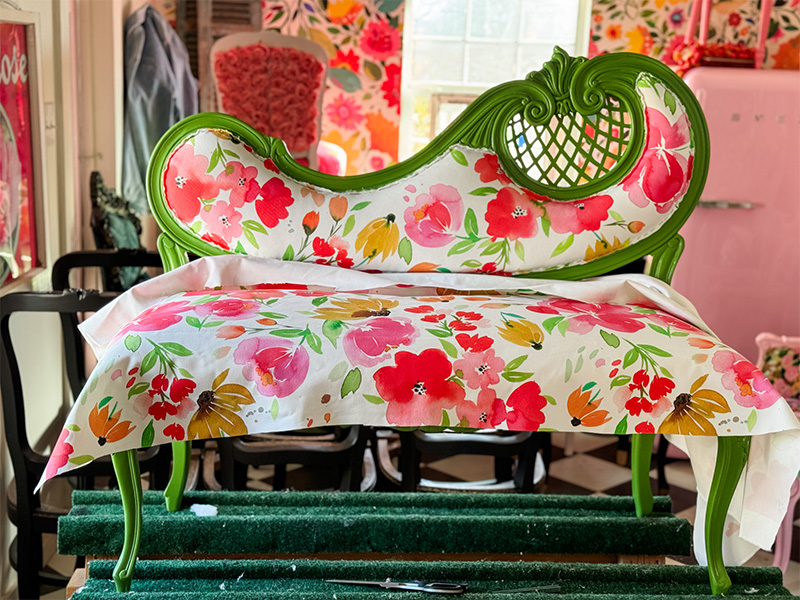
Step 24. Position the seat fabric
Now for the most important part — attaching the fabric. We’re going to take our time on this step, starting with positioning. Lay your fabric on top of your seat and position it to get your desired look.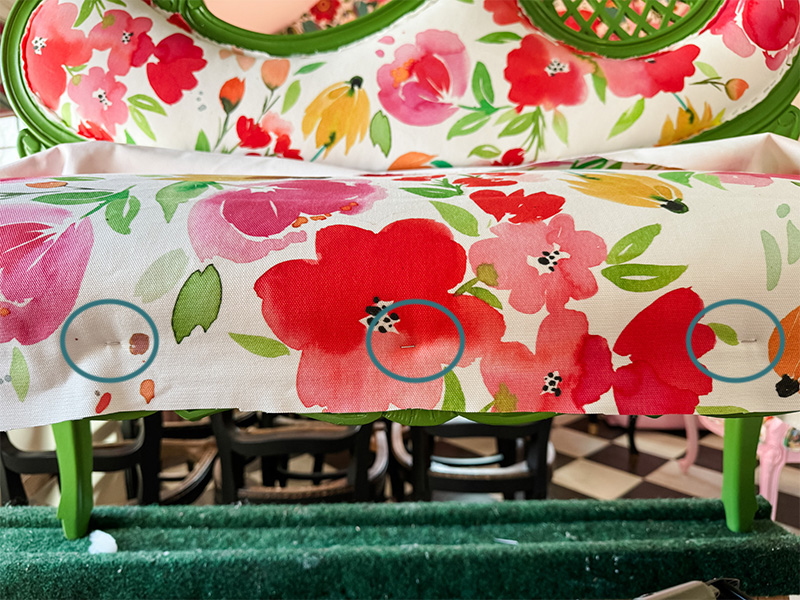
Step 25. Attach temporary staples in the front
To keep things still as we work around the seat, place a few temporary staples to hold the fabric in front.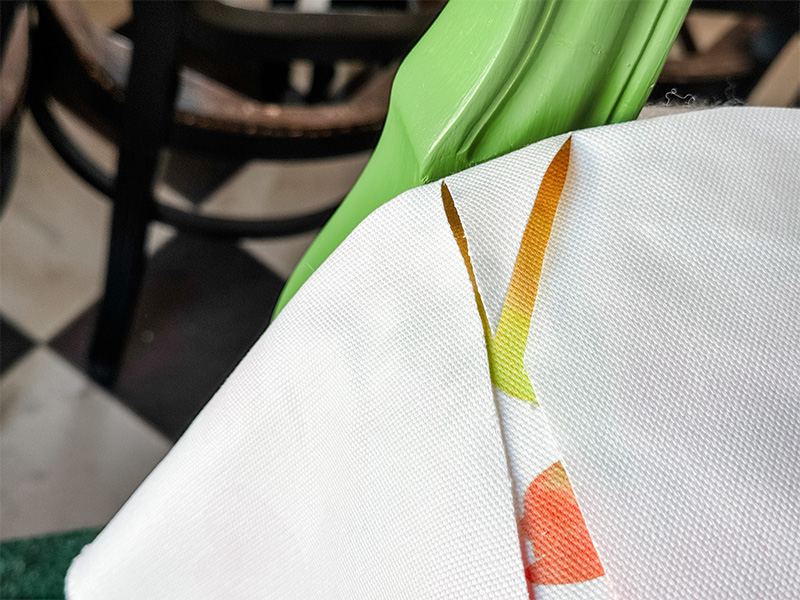
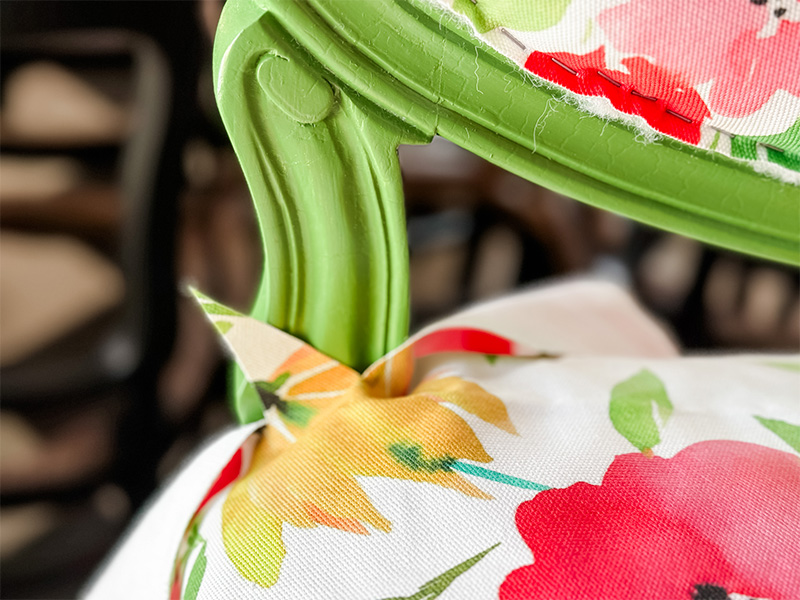
Step 26. Arrange fabric around the back sides
With the design sides facing, make a V cut at the back of each side. Fold the fabric around the wood and tuck the V into a pocket so it can’t be seen.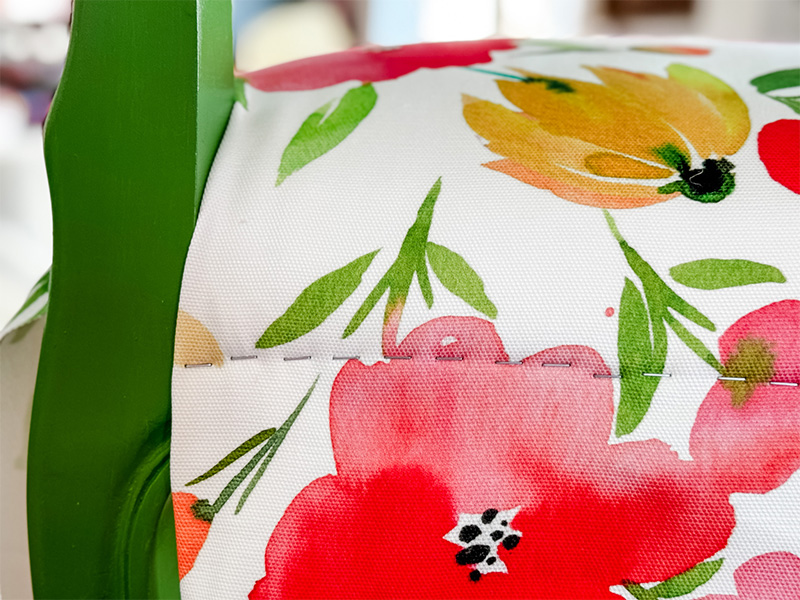
Step 27. Staple fabric around the back sides
Staple the back sides and fold the end edges underneath to get a straight line.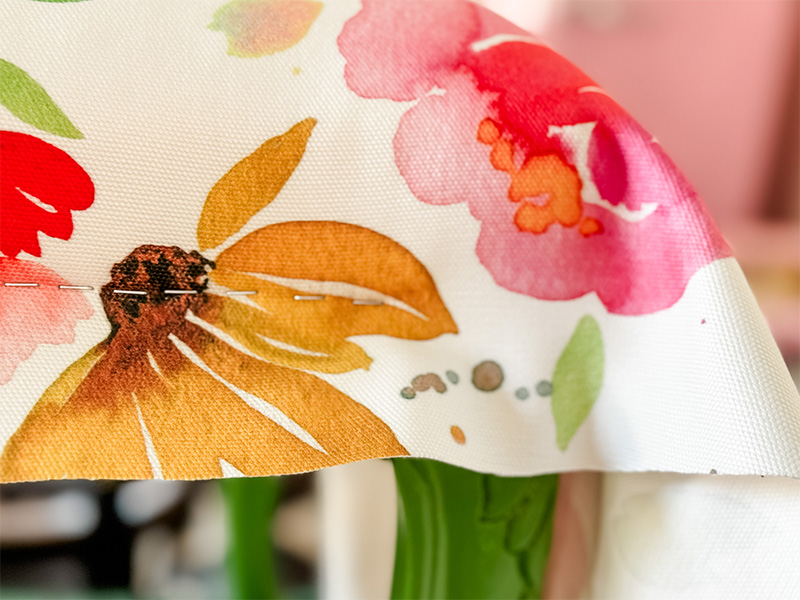
Step 28. Staple from the center to the edges
Undo your temporary staples in front, we’re going to replace them with actual staples. Pull the fabric tightly and staple starting at the center and working your way to each edge. Stop before getting to the edge and leave it open.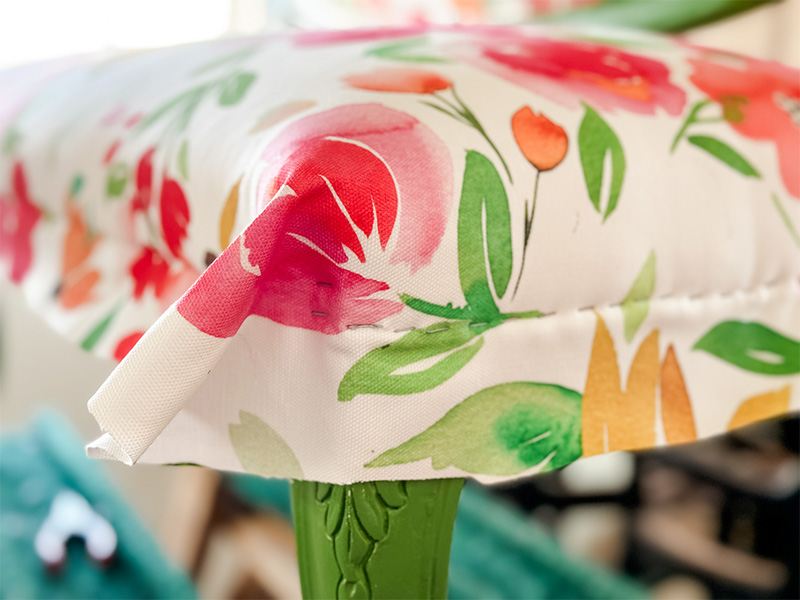
Step 29. Staple the sides
Staple the sides and come around to the front, pulling the fabric tightly. Place a couple of staples to hold it into place. We’re about to fold this corner over.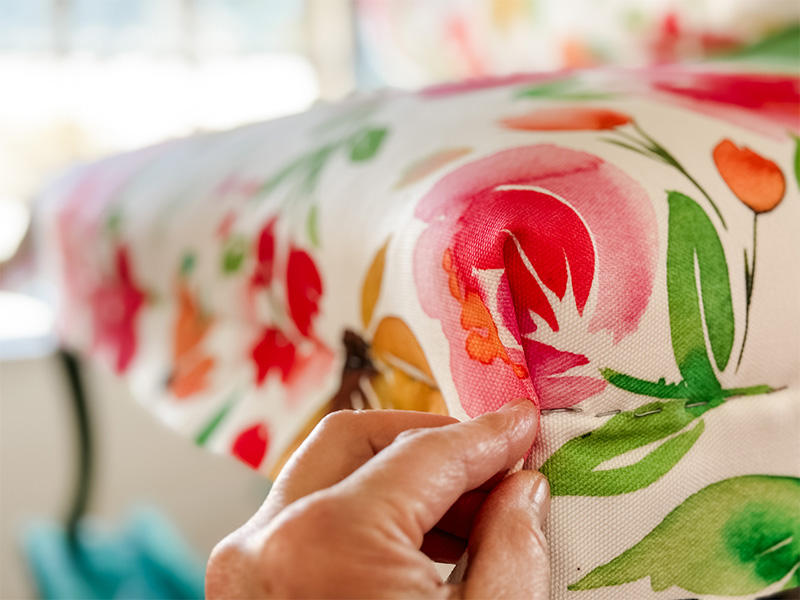
Step 30. Fold the edges over
Go back to the front and fold the corner. Staple it into place so that you have a nice, folded edge. Trim off the excess fabric.Part 6: Apply finished details
Time to add those final details to complete your reupholstered settee!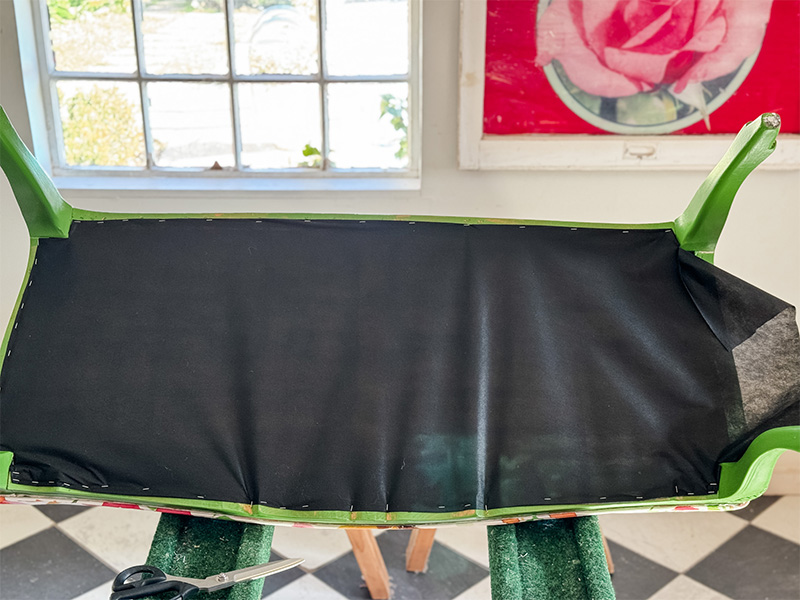
Step 31. Protect the bottom with a dust cover
Flip your settee over so that the bottom is facing up. Cover the bottom with dust cover fabric. Fold the edges under and staple to get a nice line around the bottom.Step 32. Choose which decorating trim to cover staple lines
Let’s cover those hard-working staples with something more attractive. Decide what trim you want to use to cover over the staple line.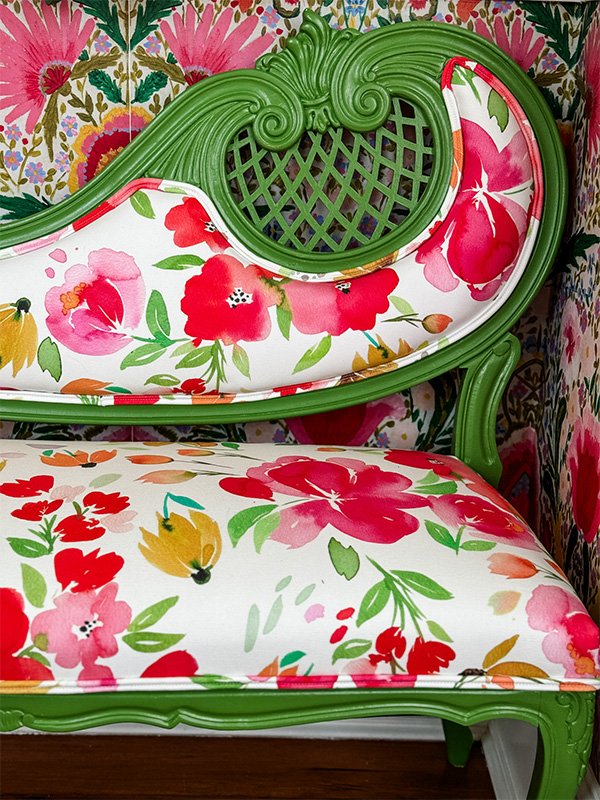
Step 33. Attach trim to staple lines
Glue (or hammer) the trim over the staple line on the seat, top and backside. Tuck the edges under and glue down so you have a nice finish.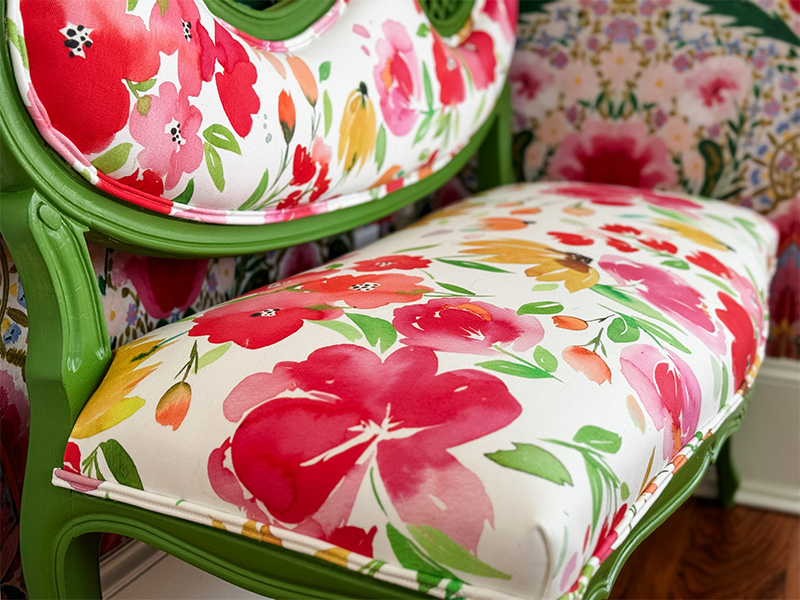
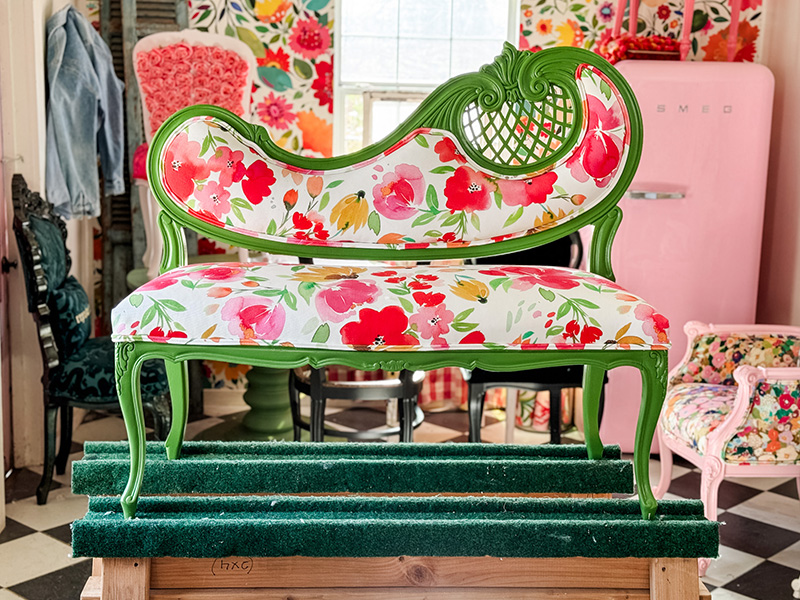
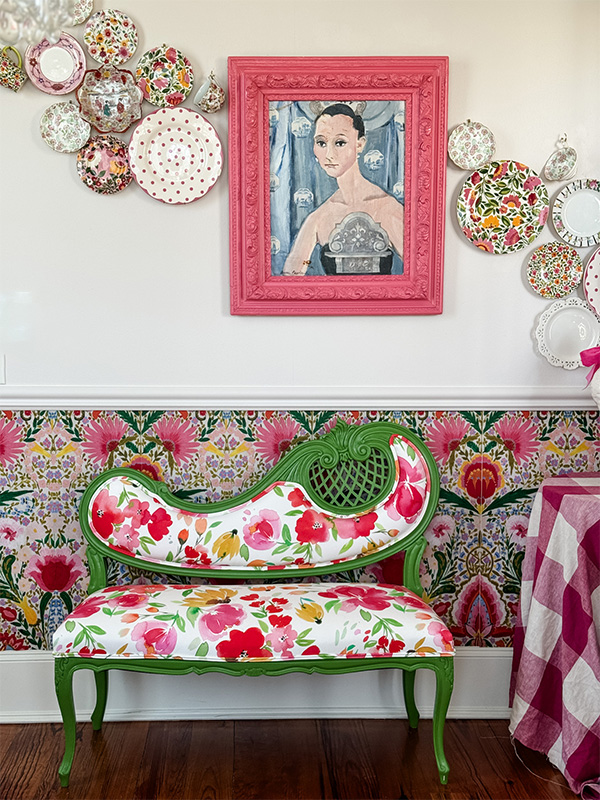
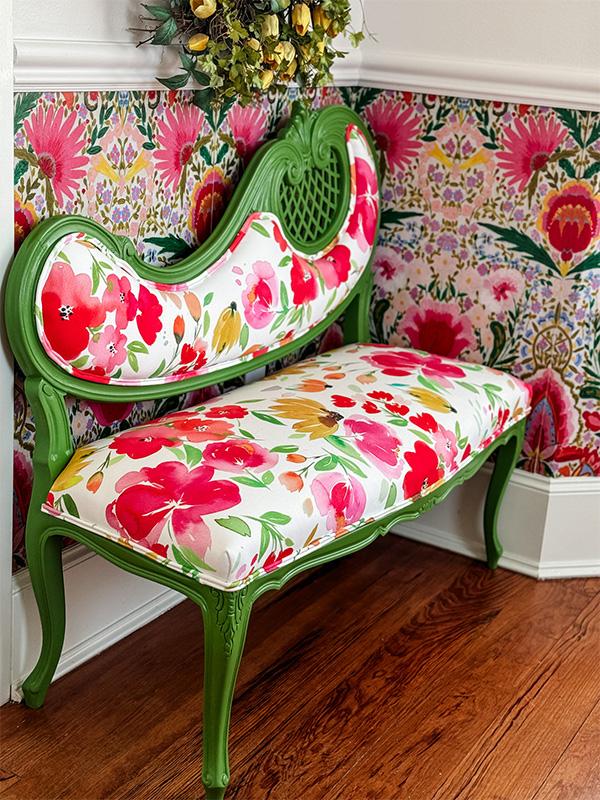
Frequently Asked Questions
Why should I reupholster furniture?
Reupholstering furniture gives it a second life instead of disposing of it for something new. Reupholstering a piece of furniture allows you to make it more personable to your style and space.Is it hard to reupholster a settee?
Reupholstering a small piece of furniture like a settee is a great project for people new to reupholstery. Dedicate this activity to a day you have unlimited time so you can give your settee the attention it needs for the perfect finish.What fabric should I use to upholster a settee?
Cypress Cotton Canvas is easy to work with and has a thick, upholstery-grade basketweave texture. It’s the ideal fabric for furniture rehabbers, interior designers and hobby sewists.Want to learn more about upholstery?
Made to order using unique designs from artists worldwide.
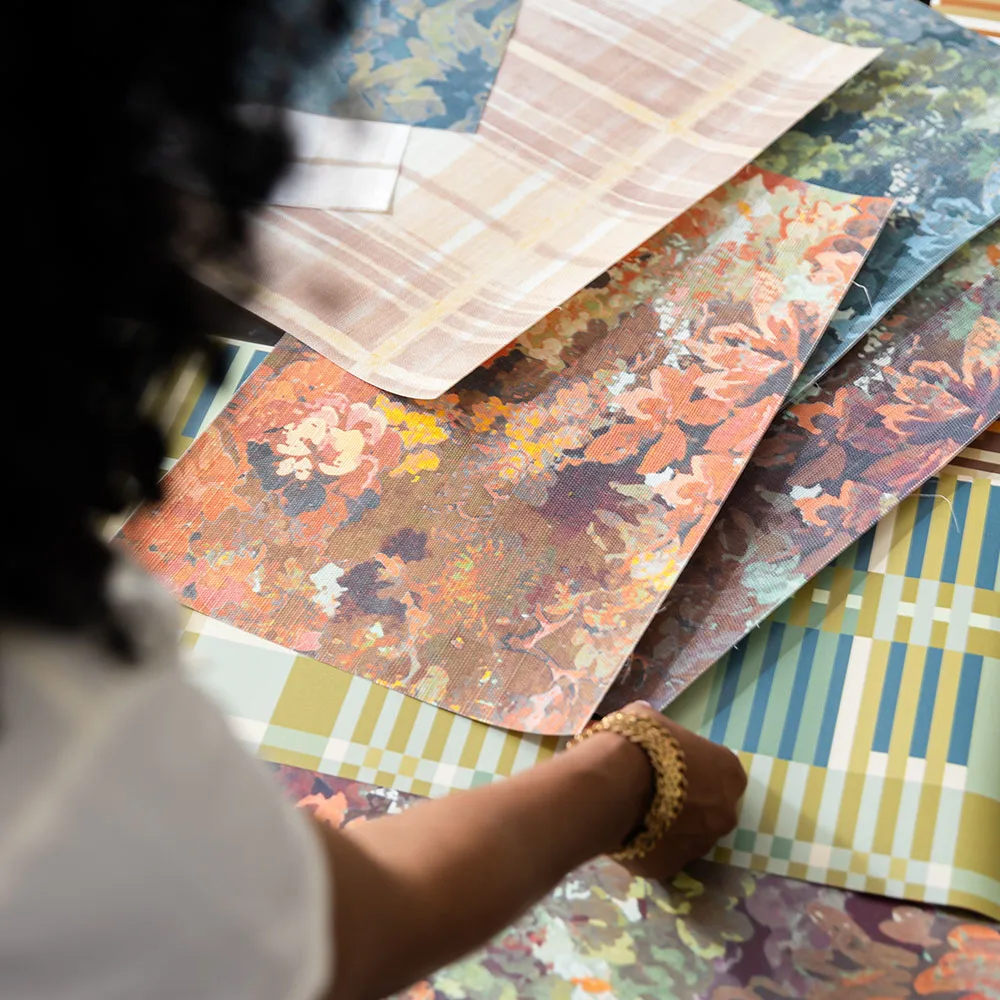
The World’s Largest Design Library for Wallpaper and Textiles
Discover a world of design—from minimalist to maximalist. Thousands of global artists, with new styles added constantly.
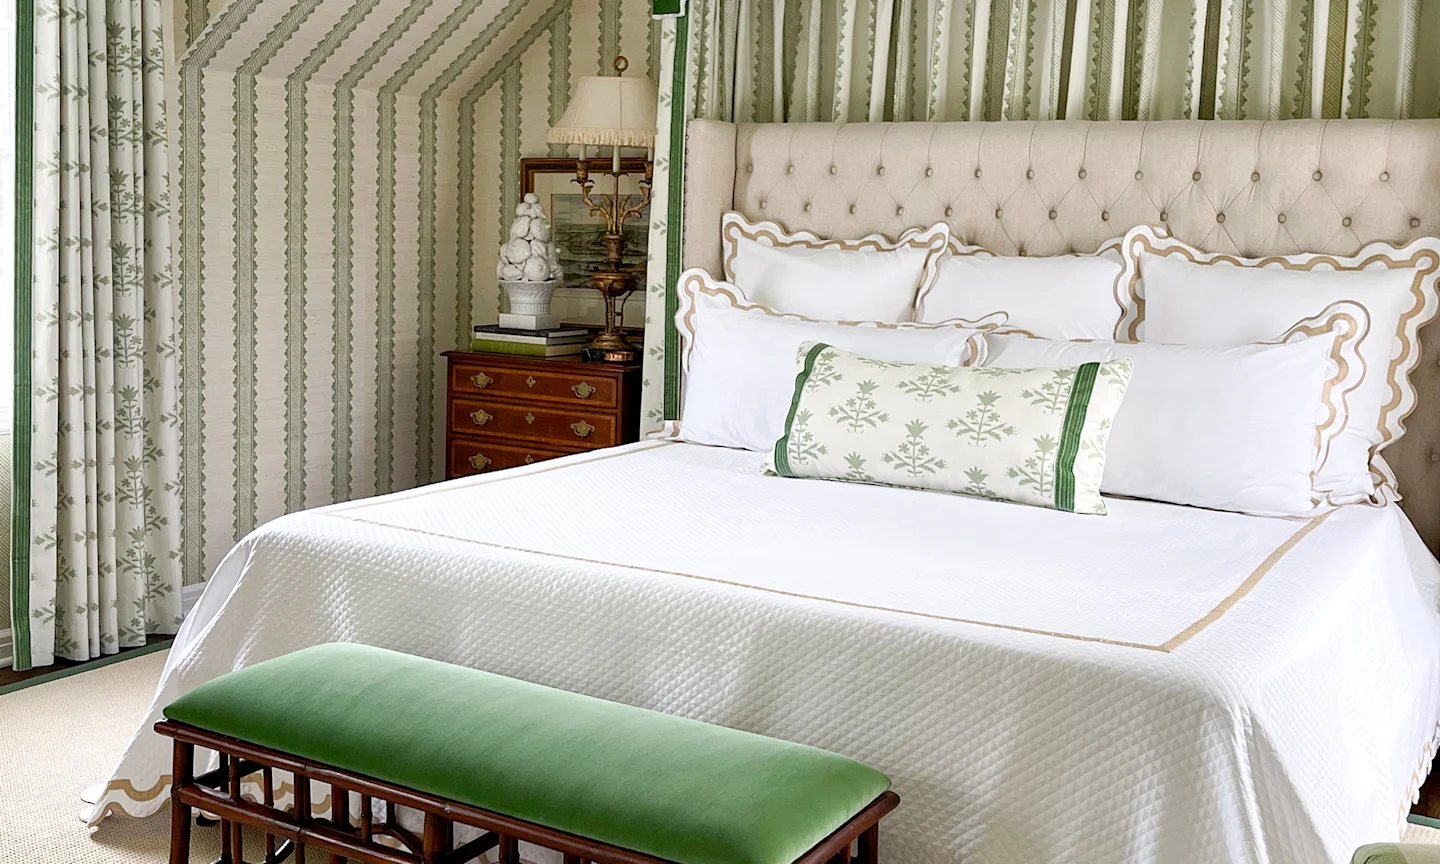
Custom Designs on Any Item
Our made-to-order model lets you print any design on any material. Coordinate patterns across rooms for a cohesive, personalized home.
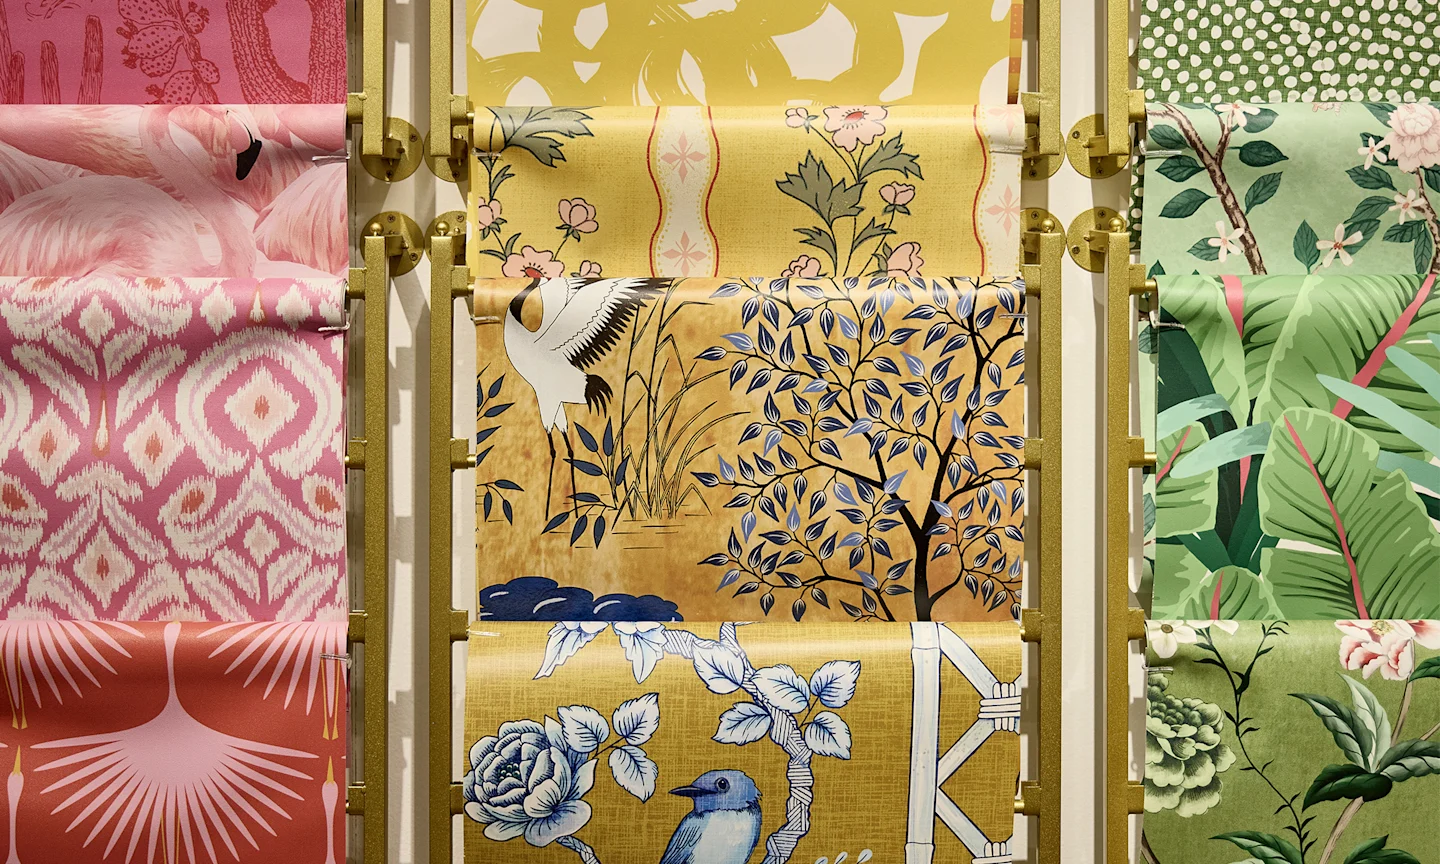
Premium Materials, Always in Stock
Trusted by pros and enthusiasts, our responsibly sourced textiles and papers offer the perfect finish—from smooth to textured, delicate to durable.
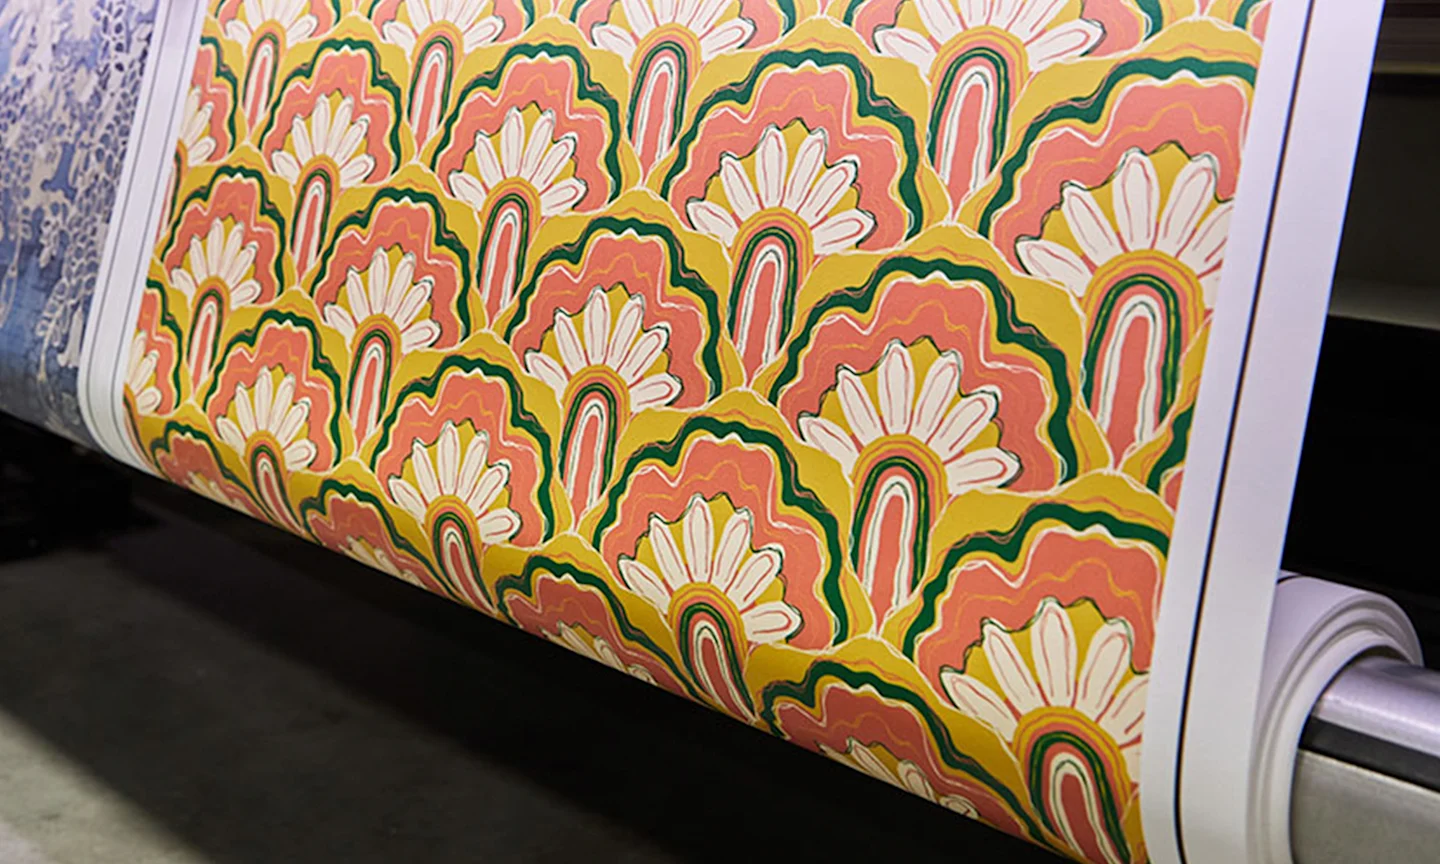
Printed on Demand in the USA
Our print-on-demand model lets you choose your design, material, and quantity—minimizing waste with non-toxic inks and reduced packaging.