Accessibility Statement
    September 24, 2025 • Updated February 25, 2026

    How to Make a Garden Flag - Spoonflower Blog

    Garden flags are an easy way to add a pop of color to your yard, porch or front entrance, plus it’s a fun way to subtly say hello to visitors and neighbors from afar! Grab some Recycled Canvas in your favorite design and join Meg Fleshman to learn the sewing steps towards a year-round collection of these festive flags.
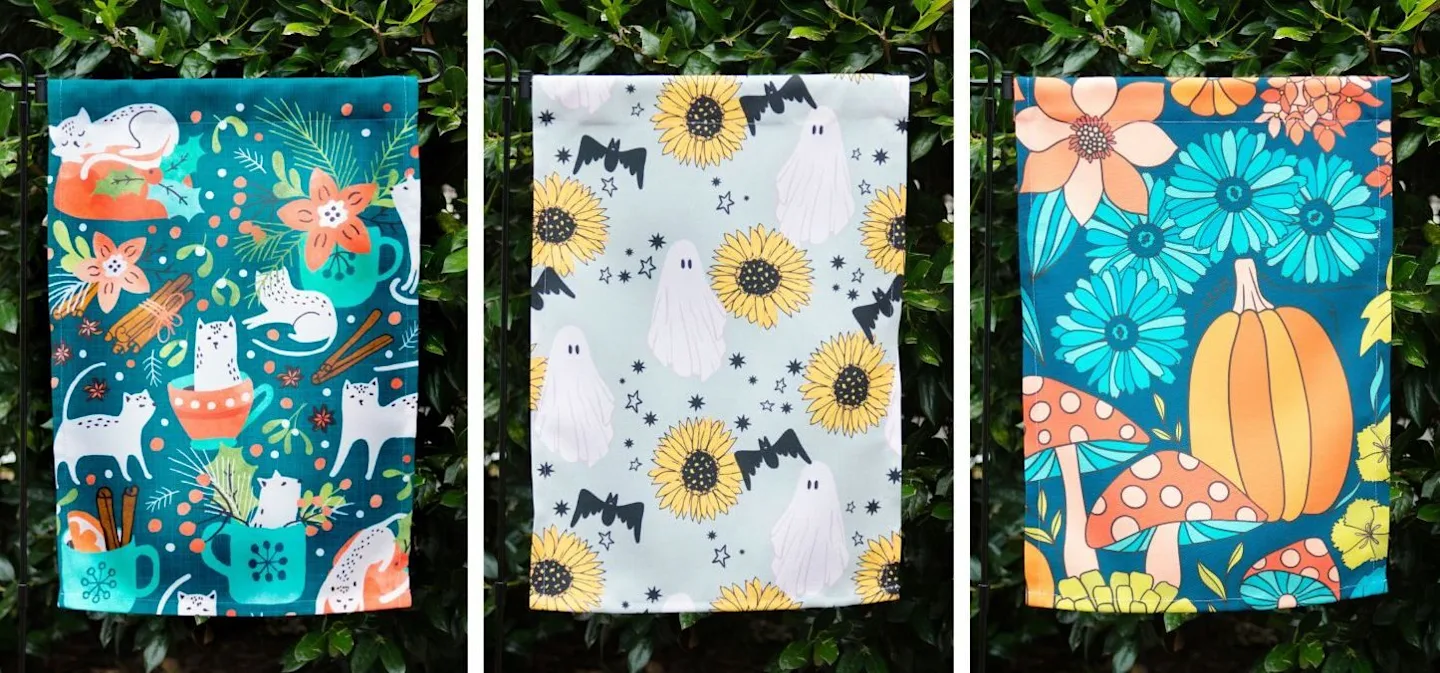
    Three garden flags against a dark green bush: The first flag has white cats, green leaves and berries. Second has white ghosts and yellow sunflowers, third has a big pumpkin, some mushrooms and flowers.
    Today I’m sharing a super quick tutorial for making your own custom garden flags, perfect for marking changing seasons, upcoming festivities, milestones and other celebratory events. Since it’s such a quick and beginner friendly project, it’s a great choice for a batch sewing project, giving you custom garden flags to decorate with all year long.
    Finished garden flags laid out on a table
    Finished garden flags laid out on a table
    These DIY garden flags are made using Spoonflower’s Recycled Canvas, a woven fabric composed of 50% REPREVE® recycled fibers made from plastic bottles—10 bottles per yard/meter, in fact! It’s a durable fabric perfect for outdoor uses like custom flags.With fall in full swing in the northern hemisphere and winter holidays close behind, these garden flags are a simple and weather resistant way to decorate, from welcoming trick or treaters to wishing visitors happy holidays. Plus, if you have access to a cutting machine and heat transfer vinyl, these garden flags can be further decorated with monograms, greetings, favorite sayings and other images for ultimate decor personalization! Fabric tip: You can do this project with either a fat quarter in a non-directional design or a tea towel design that wouldn’t be disrupted by folding over the edges.

    Materials for a Garden Flag

    Skill Level: Beginner
    • 1 yard of Recycled Canvas
    • Rotary cutter or scissors
    • Ruler
    • Sewing machine
    • Matching thread
    • Iron
    • Garden flag holder

    Steps to Sew A Garden Flag

    Step 1. Cut the Fabric

    Begin by cutting a rectangle measuring 14.5” x 21” (37 x 53 cm). The finished flag will be 12.5” x 18” (31.75 x 45.75 cm).
    Using a rotary cutter to cut the edges of the fabric to form a rectangle
    Using a rotary cutter to cut the edges of the fabric to form a rectangle
    For all-over prints, a rotary cutter and a ruler are super efficient. However, if you’re using a print with a design element you want placed a particular way on the flag, I recommend creating a template with paper or poster board to cut out the rectangle. Remember that the top of the flag will be folded over a total of 2” (5 cm) and the bottom will be folded over 1” (2.5 cm).
    Using a template to cut the shape of a rectangle, used to center a Halloween garden flag with a moon and crows.
    Using a template to cut the shape of a rectangle, used to center a Halloween garden flag with a moon and crows.

    Step 2. Fold and Sew the Long Edges

    With wrong sides facing each other, press a 1/2” (1.3 cm) hem along both long edges. Fold the hem over one more time, again at 1/2” (1.3 cm) and press. Edge stitch both sides.
    step-2-hem-sides-02-edited-scaled
    step-2-hem-sides-02-edited-scaled
    step-2-pressing-2nd-hem-01-edited-scaled
    step-2-pressing-2nd-hem-01-edited-scaled

    Step 3. Fold and Sew the Bottom Edge

    Exactly how we finished the side edges, press the bottom edge of the flag with a 1/2” (1.3 cm) hem, wrong sides facing. Fold another 1/2” (1.3 cm), press and edge stitch in place. You should now have a rectangle with three hemmed sides and the top still raw.

    Step 4. Create the Top Casing

    Folding the casing down at the top of the garden flag
    Folding the casing down at the top of the garden flag
    Just like the other sides, begin by pressing a 1/2” (1.3 cm) hem at the top, once again with wrong sides facing. To create the casing, fold the top edge but this time at 1.5” (3.8 cm), then edge stitch a final time.
    Finished casing for the garden flag, folded at the top
    Finished casing for the garden flag, folded at the top

    Step 5. Press and Slide into a Garden Flag Holder

    You’re almost done! For the next and final step, give the garden flag a final press and slide it onto a garden flag holder! For extra customization, try adding a greeting or design using a cutting machine and some heat transfer vinyl.
    Finished Halloween garden flag, reading "Happy Halloween" in black fun text and sitting in the garden.
    Finished Halloween garden flag, reading "Happy Halloween" in black fun text and sitting in the garden.
    Thanks so much for checking out this tutorial — we can’t wait to see your finished garden flags! Happy sewing!

    Frequently Asked Questions

    Where can I find out more about Recycled Canvas?

    Read all about our Recycled Canvas, including its printable width, fabric structure, recommended needle size and more.

    How do I wash my garden flags?

    Recycled Canvas garden flags can be washed in cool water using a gentle machine cycle. Machine dry using a low temperature setting and remove promptly to avoid wrinkles.

    Looking For More DIY Projects?

    WHY SPOONFLOWER?

    Made to order using unique designs from artists worldwide.